Let’s be real for a sec there’s somethin’ magical about embracing your natural texture. The way coils and curls form Natural Afro Hairstyles that create stunning silhouettes is unmatched. I’ve spent years watching natural hair journeys unfold, and lemme tell you, the versatility of Natural Afro Hairstyles never ceases to amaze me.
Whether you’re just starting your natural journey or you’ve been rocking your texture for years, there always room to play and experiment with new styles. The beauty of afro hair lies in its incredible adaptability – one day you can rock a towering fro, the next a sleek protective style.
So grab your favorite products, some patience, and let’s dive into these 33+ stunning natural styles that’ll have everyone asking “how’d you do that?”
1. Classic Afro
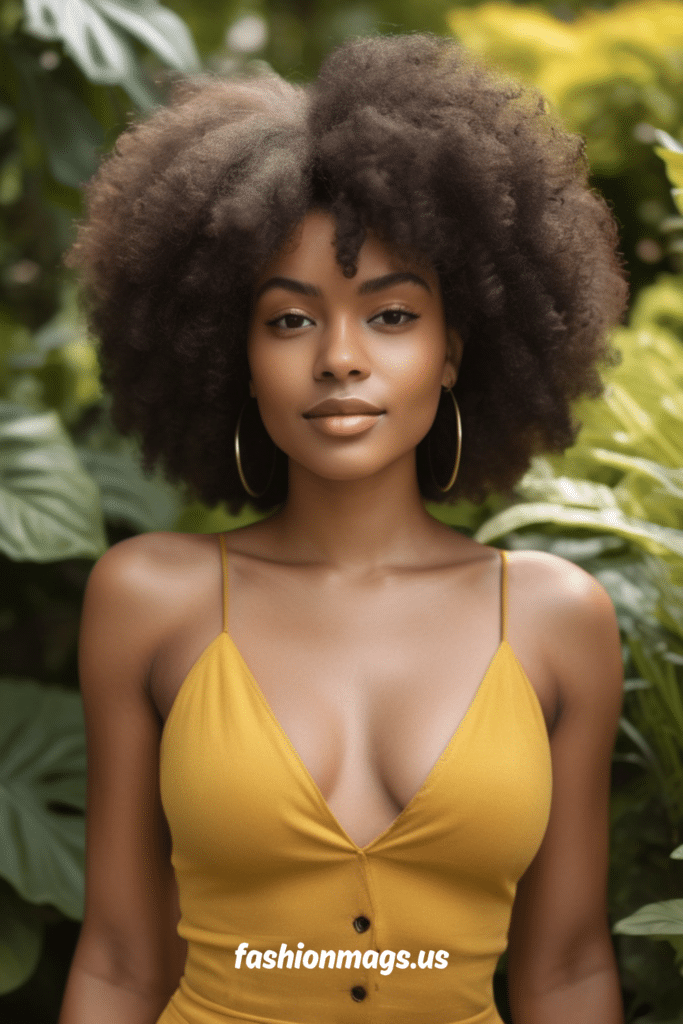
The iconic afro never, ever goes outta style. This timeless look celebrates volume and showcases your natural texture in all its glory.
To achieve the perfect rounded shape, you’ll need a wide-tooth pick comb and some light moisturizing oil. Start with freshly washed and detangled hair. Pick from the roots upward and outward, working your way around your entire head. Remember to be gentle – we want definition without breakage!
Pro tip: Sleep with a satin bonnet to maintain your shape and minimize shrinkage. And don’t be afraid to trim regularly for that perfect spherical silhouette that frames your face just right.
2. Twist-Out Perfection
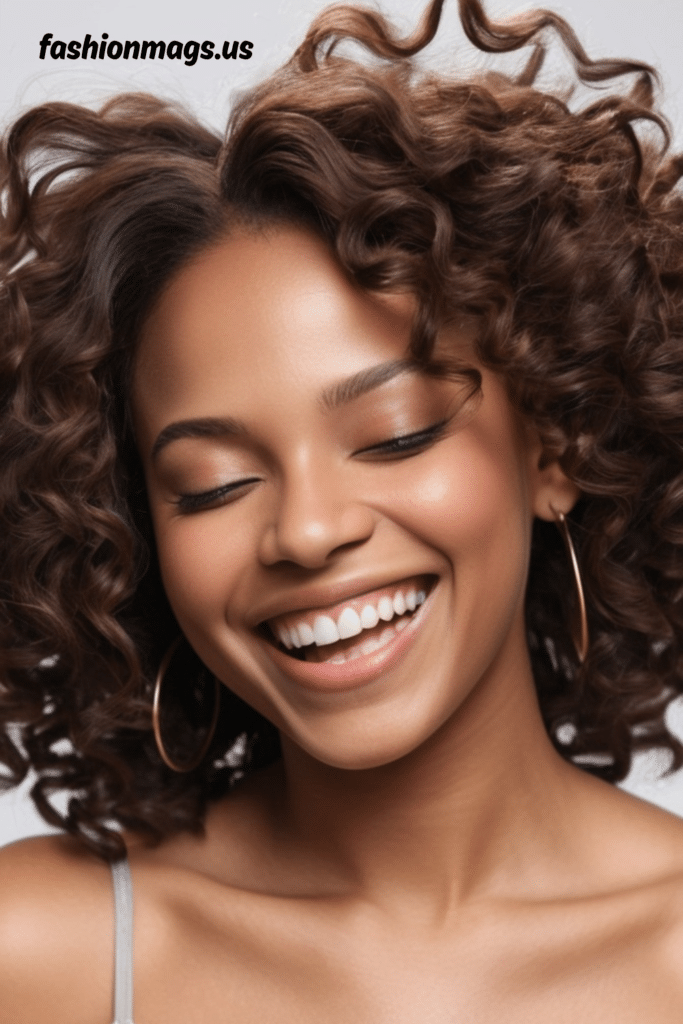
Twist-outs are the reliable bestie of natural hair styles. They create defined curls that can last for dayz with proper care.
Begin with dampened hair and section it into manageable parts. Apply your favorite leave-in conditioner and curl-defining cream before twisting small to medium sections. The smaller the twists, the tighter the resulting curl pattern. Let the twists dry completely (overnight is best) before gently unraveling.
I personally love using a tiny bit of oil on my fingertips when untwisting to reduce frizz. And remember – resist the urge to separate your curls too much! Sometimes less manipulation equals more definition.
3. Two-Strand Flat Twists
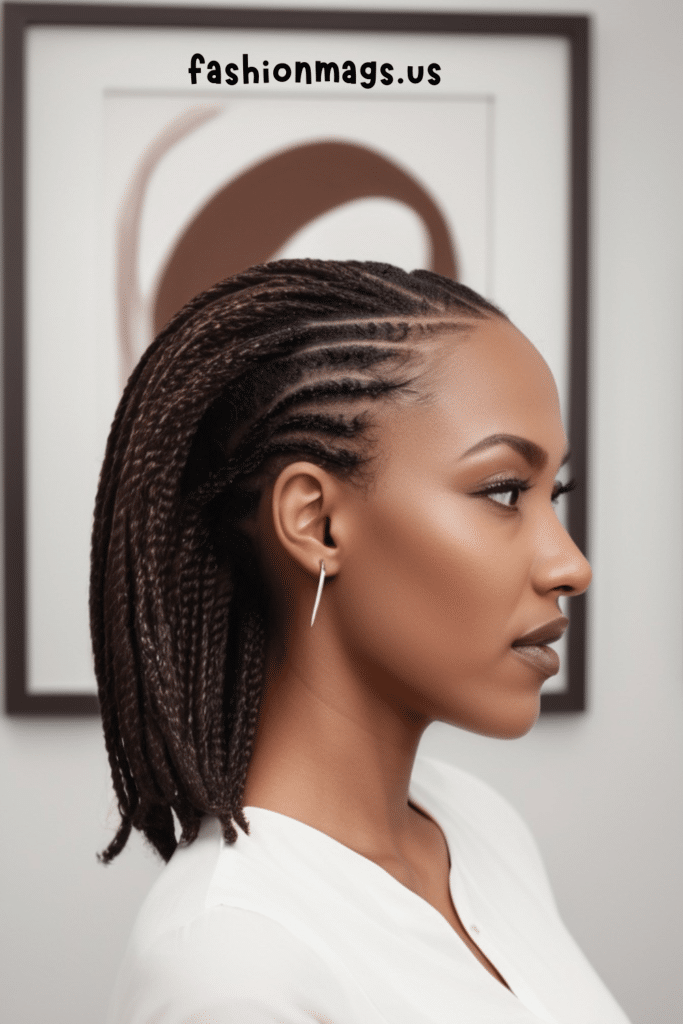
This versatile protective style works for any length and can be worn as is or unraveled for a gorgeous twist-out.
Create a clean part wherever you want (side parts are my absolute fave) and section your hair. Working with moisturized hair, divide each section into two strands and twist them around each other, picking up more hair as you go – kinda like a French braid but with just two sections. Secure the ends with small rubber bands if needed.
These can be styled in countless ways – all pulled back, half-up-half-down, or even in geometric patterns across your scalp for extra drama.
4. Bantu Knots
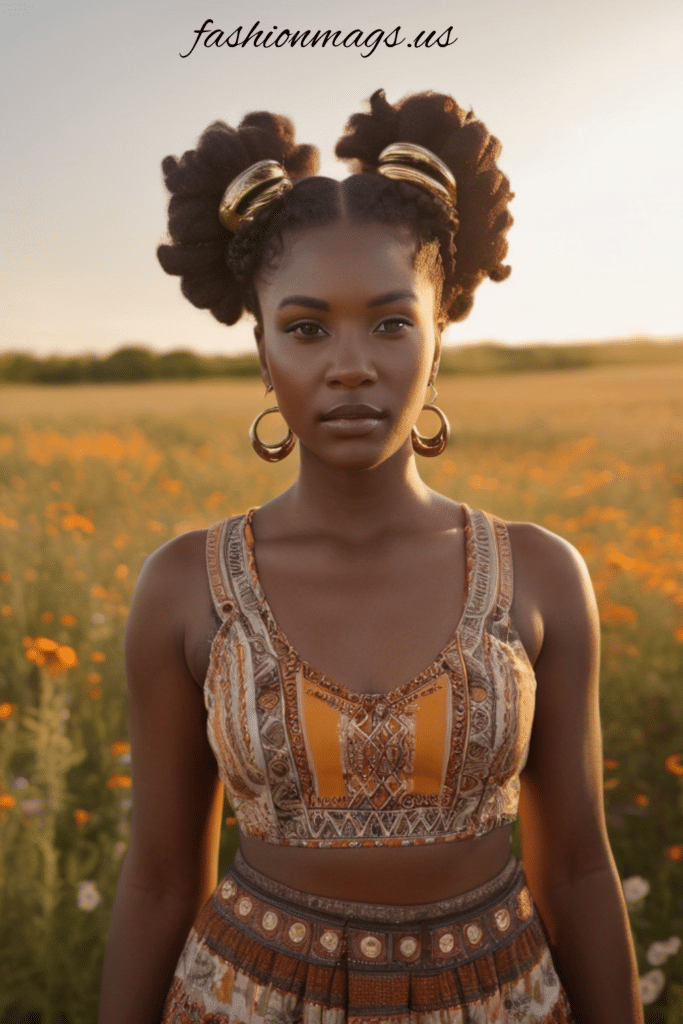
Bantu knots aren’t just an amazing protective style – they’re a cultural statement with roots in various African traditions. And they look absolutely fierce.
Divide clean hair into sections based on your desired knot size. Twist each section tightly from root to tip, then wrap around itself to form a compact knot. Secure with bobby pins if necessary. You can rock these knots as is for a bold geometric look or unravel them after they’ve set for a stunning heat-free curl pattern.
The key to perfect Bantu knots? Making sure each section is detangled and evenly moisturized before twisting. Trust me on this one.
5. Wash ‘n Go
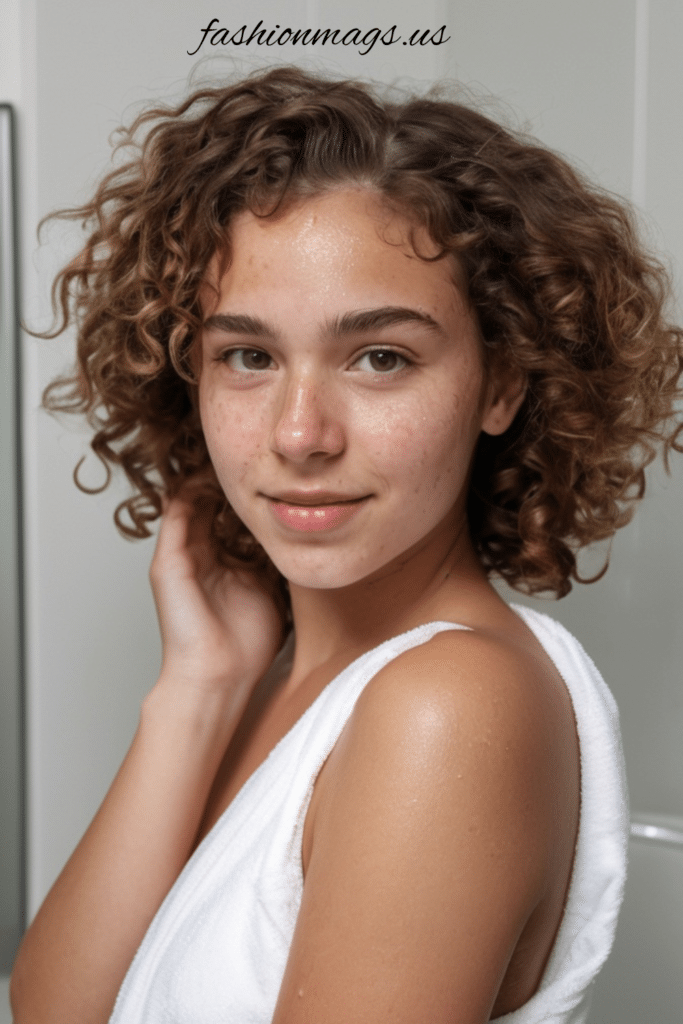
Don’t let the name fool ya – a proper wash and go actually requires technique, but the results are sooo worth it.
After cleansing, apply a leave-in conditioner while your hair is still soaking wet. Follow with a curl enhancer and gel, using the “praying hands” method to distribute product evenly. Gently scrunch upward to encourage curl formation. Air dry or use a diffuser on low heat.
The secret to lasting definition? Product combination and application technique. Find what works for your particular curl pattern thru trial and error, and don’t be discouraged if it takes a few attempts to perfect.
6. Pineapple Updo
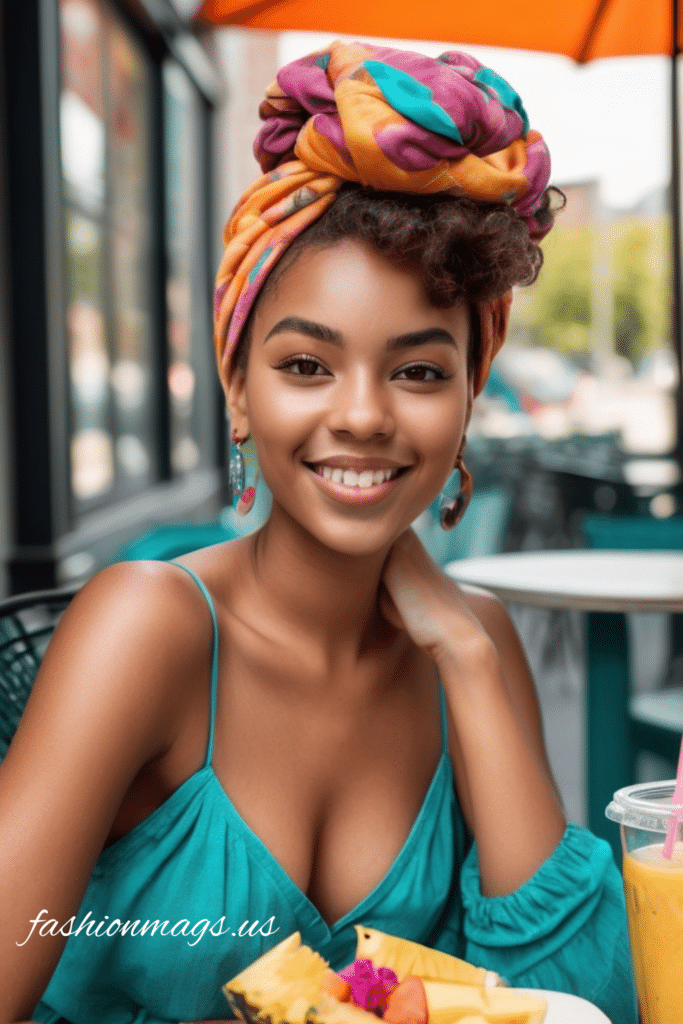
This playful style is perfect for second or third-day hair when your curls need a refresh but you dont have time for a full restyle.
Gather all your hair at the very top of your head (like a high ponytail) and secure loosely with a satin scrunchie or wide band. Allow your curls to cascade down freely, creating that pineapple-like shape. Pull out a few tendrils around your face for a softer look.
This style not only looks cute but also preserves your curl pattern overnight. Just remove the scrunchie in the morning, fluff gently, and refresh with a light mist of water and oil.
7. Flat-Twisted Updo
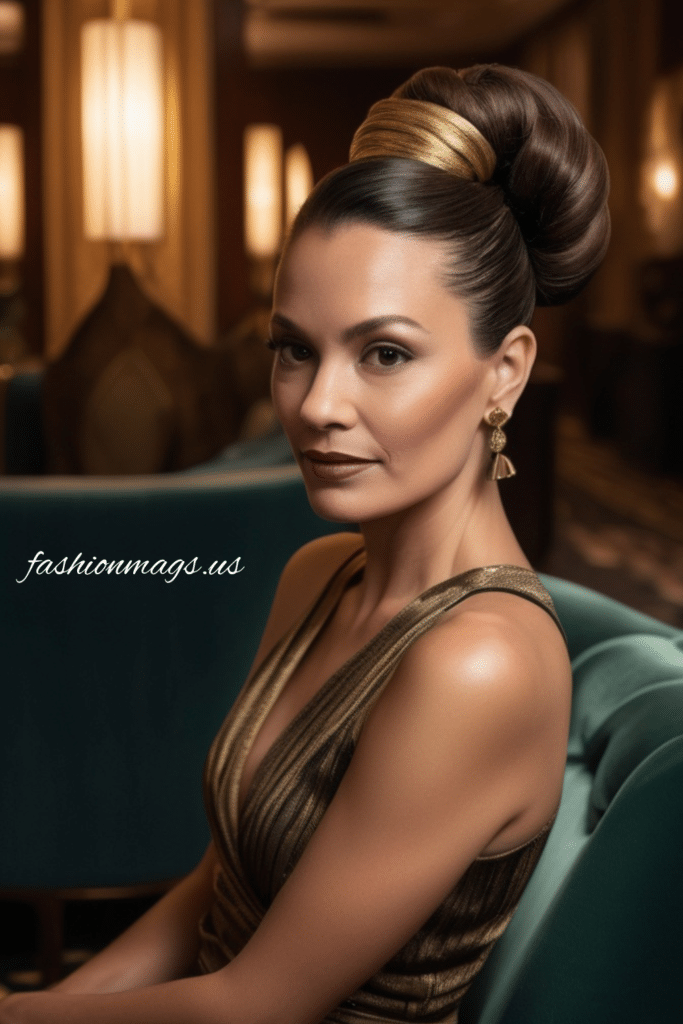
Elevate your protective styling game with this elegant updo that works for professional settings and special occasions alike.
Create flat twists starting from your hairline and working toward the crown. Once you reach the crown area, gather the untwisted ends and form a cute bun or tuck them under for a more conservative look. Adorn with hair accessories for extra flair.
What I really love about this style is how it can be customized based on the direction and size of the twists. Plus, it typically lasts about a week with proper nighttime care!
8. Twist and Curl
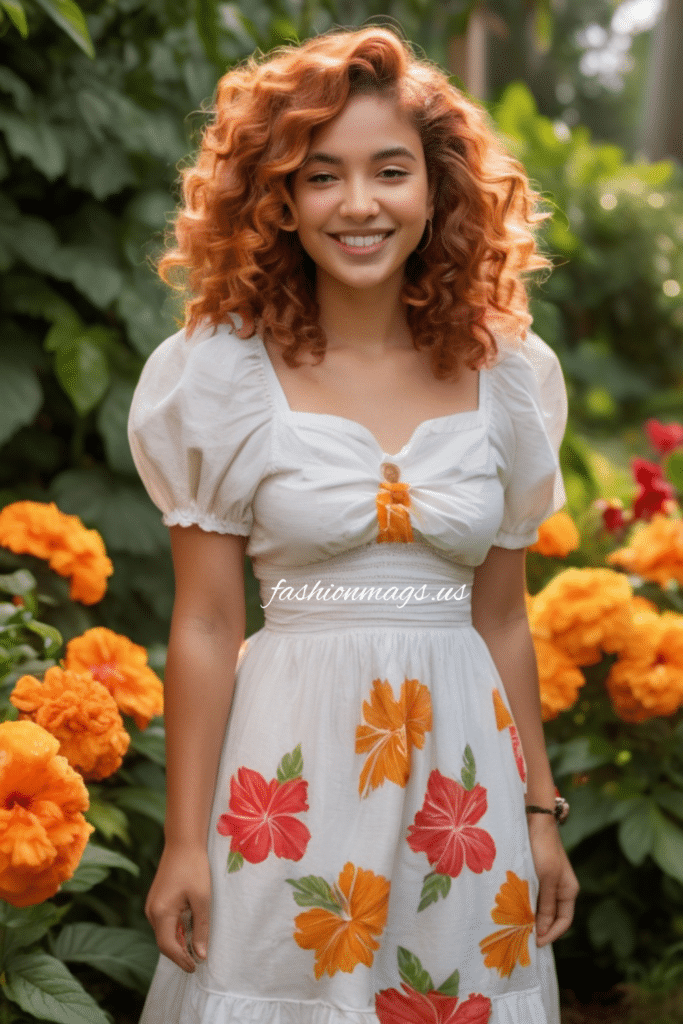
This hybrid style combines the technique of two-strand twists with rod sets for defined curls with amazing body.
Twist medium sections of moisturized hair, then wrap the ends around perm rods or flexi-rods. Allow to dry completely before removing the rods and gently unraveling the twists. The result? Voluminous curls with exceptional definition and bounce.
This has been my go-to for special events – the root stability from the twists means this style can easily last 7-10 days with minimal refreshing required.
9. Crown Braid
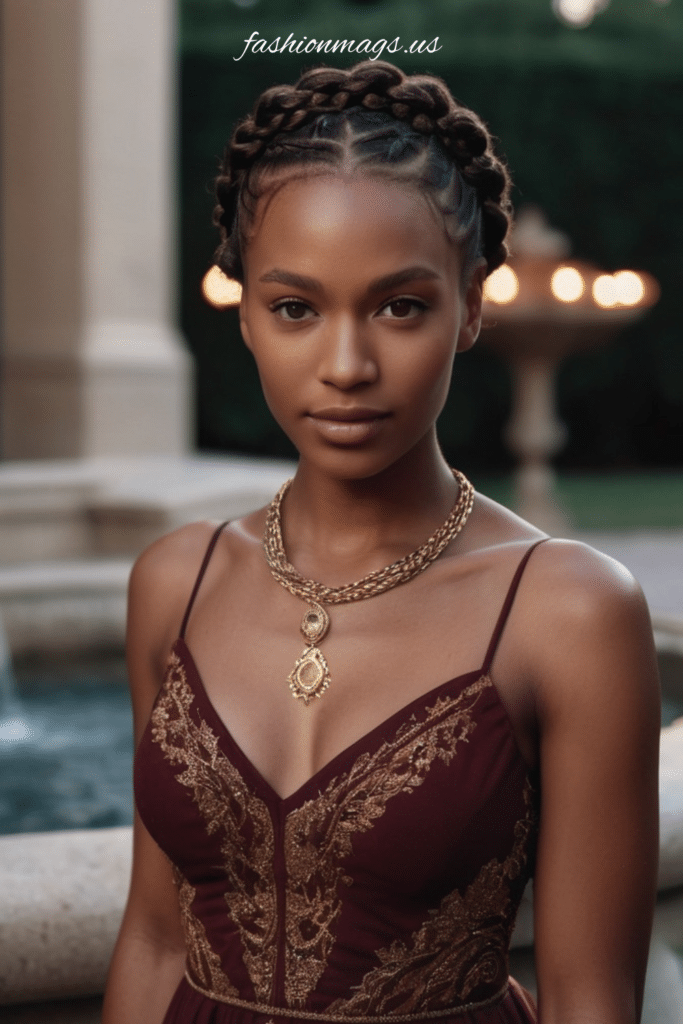
Channel your inner royalty with this regal style that keeps hair secure while showcasing your texture.
Part your hair down the middle and create large flat twists or cornrows that curve around your head like a crown. You can leave the back loose for a half-up style or continue braiding all the way around. Fluff and shape any loose sections for added dimension.
For extra protection, tuck the ends underneath the braided portion and secure with bobby pins. This style transitions beautifully from day to evening events.
10. Frohawk
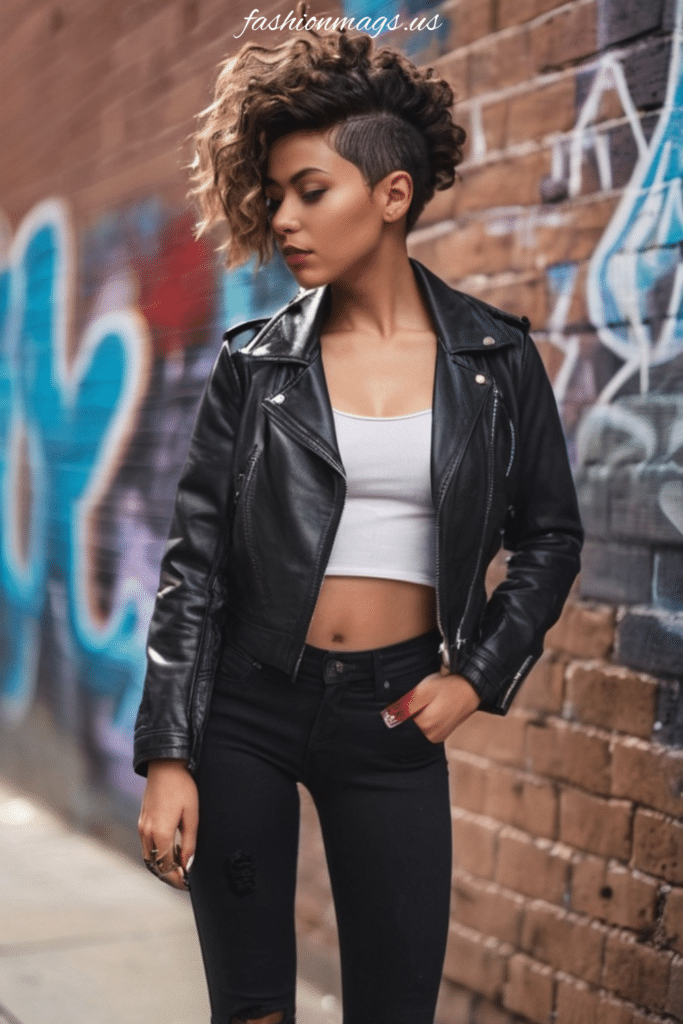
For those days when you want to make a statement, the frohawk delivers drama without requiring permanent commitment.
Use flat twists or cornrows on the sides of your head, leaving a strip of hair free from front to back. Pick and fluff this center section for height and definition. For extra hold, bobby pins placed horizontally can help maintain the shape.
One thing I’ve learned from personal experience: using edge control around the twisted sides creates a more polished, intentional look that elevates this style from casual to high-fashion.
11. Chunky Flat Twist-Out
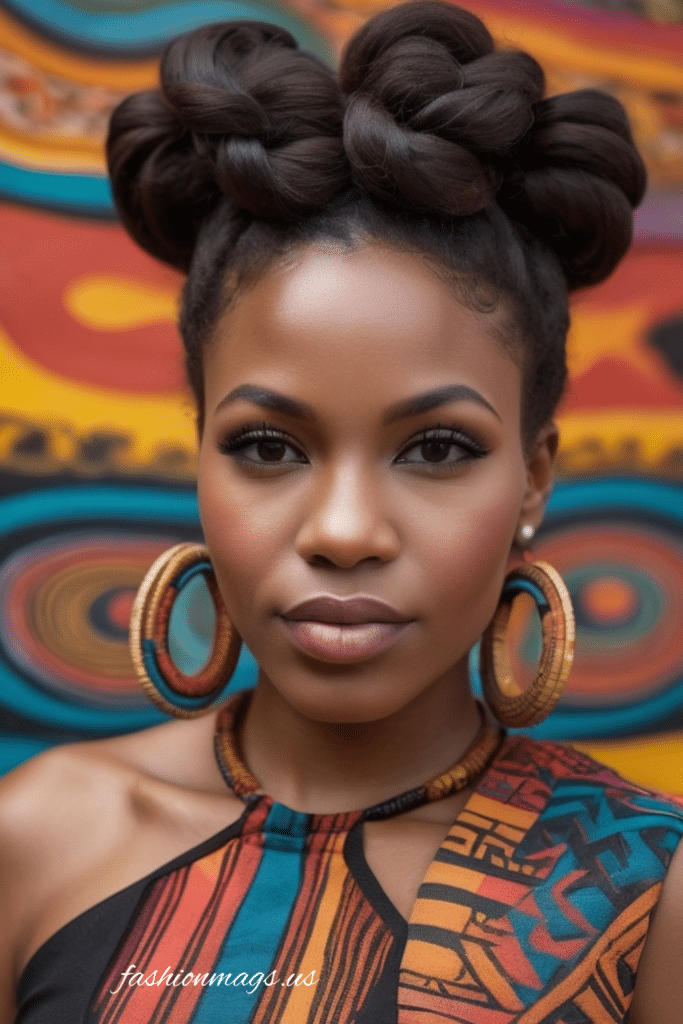
When you need defined curls but are short on time, chunky twist-outs are you’re new bestie.
Create 8-12 large twists throughout your head instead of many small ones. This takes less time but still delivers gorgeous texture when unraveled. The key is making sure each twist is smooth and evenly moisturized before drying.
I prefer this style for when I want elongated, stretched curls rather than tight definition. It gives major volume while minimizing shrinkage – perfect for showcasing length!
12. Afro Puffs
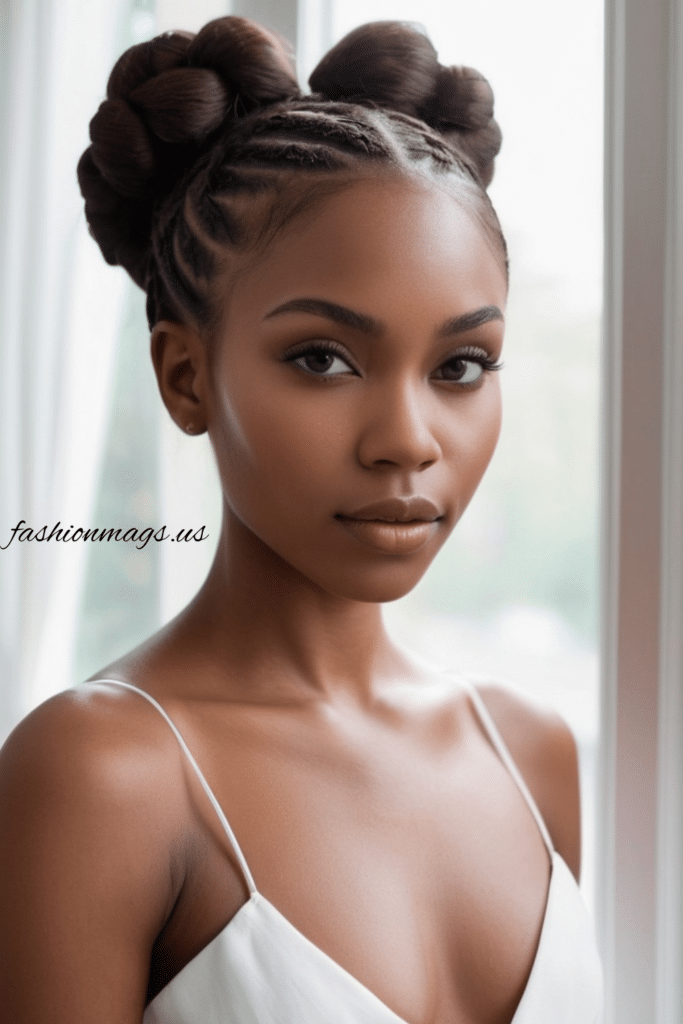
This playful style is giving nostalgic vibes while still feeling fresh and modern – plus it works on various lengths.
Section hair into two equal parts and gather each into a puff using a snag-free elastic. Position them high on either side of your head. For extra volume, gently pick the puffs after securing. Edge control around the base creates that sleek contrast with the textured puffs.
What makes this style so versatile is how it can be dressed up or down. Add some colorful barrettes for a fun weekend look, or keep it minimal for workplace vibes.
13. Halo Braid
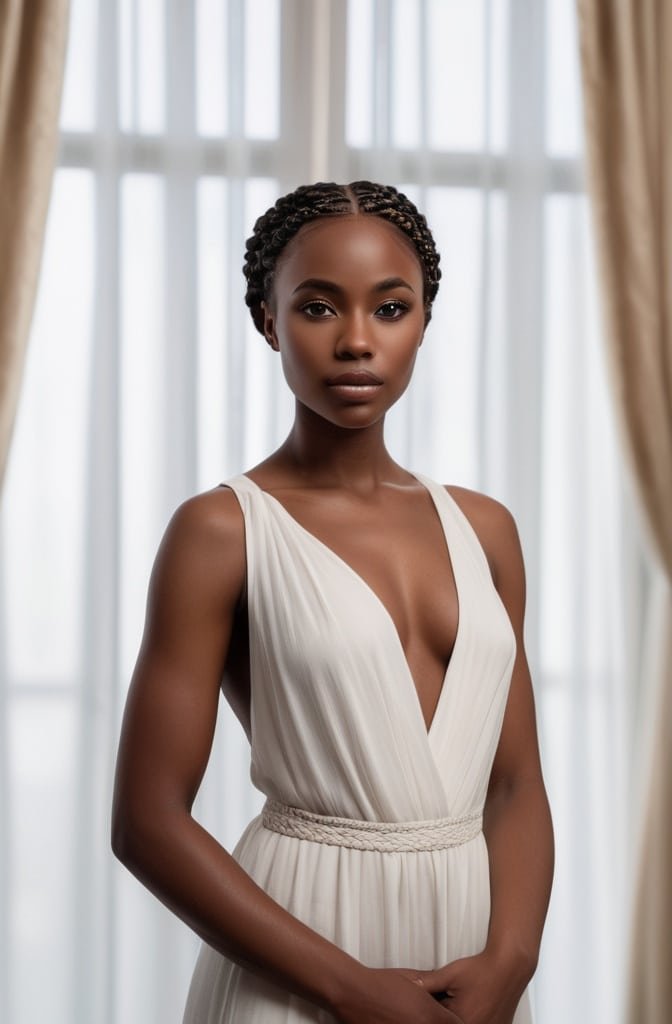
Also known as a crown braid, this elegant protective style keeps hair tucked away while creating a regal frame around your face.
Begin with stretched or blown-out hair for easiest handling. Create one long cornrow that wraps entirely around your head near the hairline. Tuck in the ends neatly to complete the circle. Apply light oil to the exposed scalp for shine and moisture.
The beauty of this style is its longevity – with proper nighttime protection, a well-done halo braid can last up to two weeks, making it perfect for vacations or busy periods.
14. Side-Swept Afro
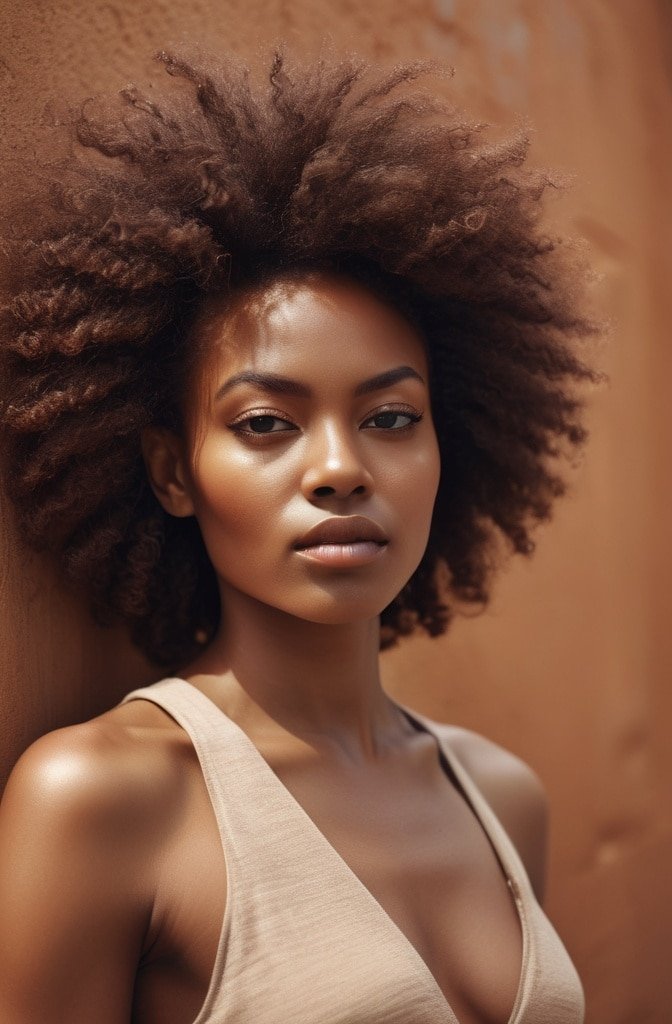
This asymmetrical look adds drama and dimension to the classic afro by focusing volume to one side.
After picking out your afro to full volume, create a deep side part. Use a combination of picking and gentle patting to direct most of the volume toward your preferred side. A light spritz of holding spray helps maintain the directional flow.
What I adore about this style is how it creates such a striking silhouette while still being relatively simple to achieve. Plus, it’s perfect for showcasing statement earrings on the less voluminous side!
15. Stretched Coils

For times when you want to minimize shrinkage while maintaining your curl pattern, stretched coils offer the perfect middle ground.
Start with freshly washed hair and apply a leave-in conditioner. Section your hair and use the banding method (wrapping small sections with thread or elastic bands at intervals) or African threading technique. Allow to dry completely before removing bands.
The result is elongated curls that showcase more of your actual length while preserving your natural texture. This technique works especially well for type 4 hair that experiences significant shrinkage.
16. Sculptural Updo
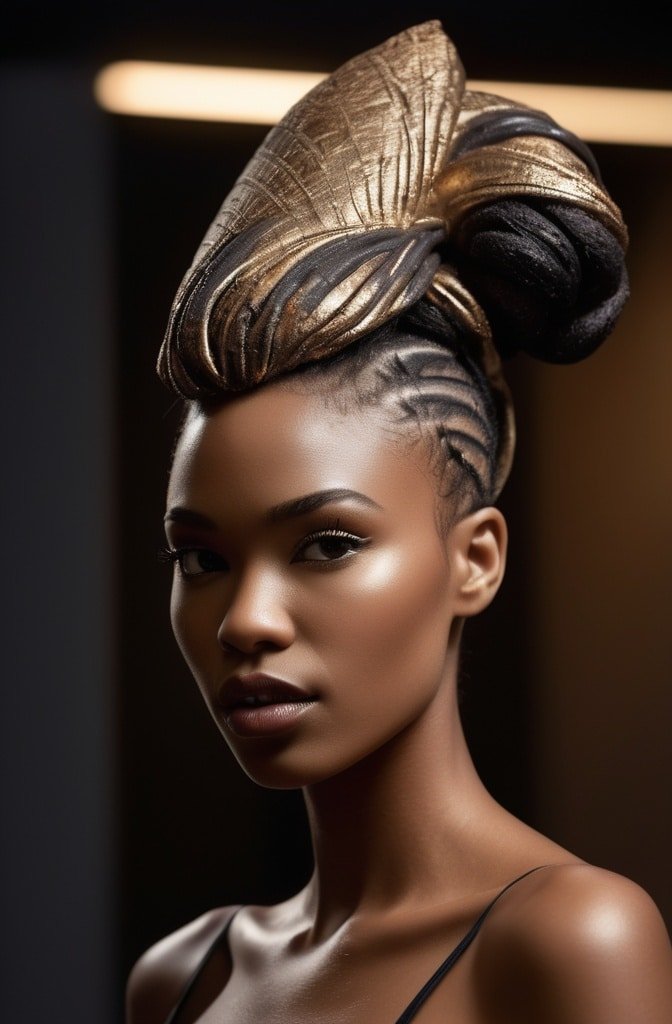
When you’re ready to turn heads at special events, a sculptured updo showcases the structural possibilities of afro-textured hair.
This style requires somewhat stretched hair, so start with a twist-out or blow-dried base. Use large bobby pins and hair ties to create architectural shapes – think asymmetrical forms, geometric patterns, or elegant swirls. Don’t be afraid to use hairspray for hold.
The beauty of these updos is their uniqueness – no two are exactly alike, making your style truly one-of-a-kind. Consider adding decorative pins or flowers for extra special occasions.
17. Tapered Cut Afro
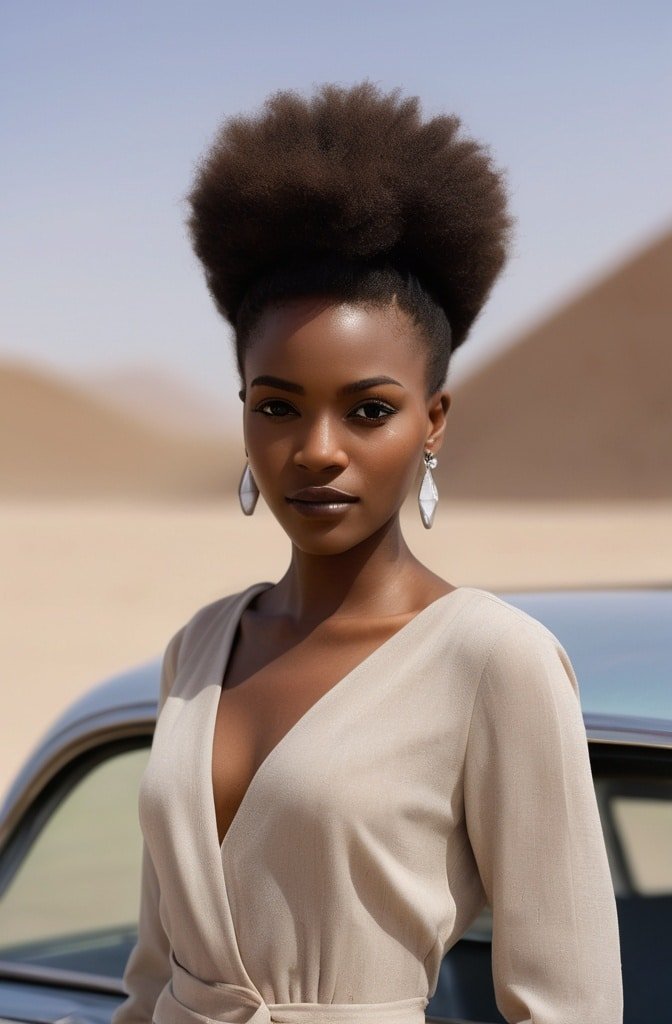
Short on the sides and back with length on top creates this stylish, low-maintenance option that frames the face beautifully.
This cut requires professional shaping initially but is relatively easy to maintain at home. To style, simply moisturize, use a pick to add volume at the crown, and define edges with a bit of edge control if desired.
The tapered cut works with your natural growth patterns to create a shape that requires minimal daily styling while still looking intentional and polished. Its my go-to recommendation for busy professionals.
18. Finger Coils
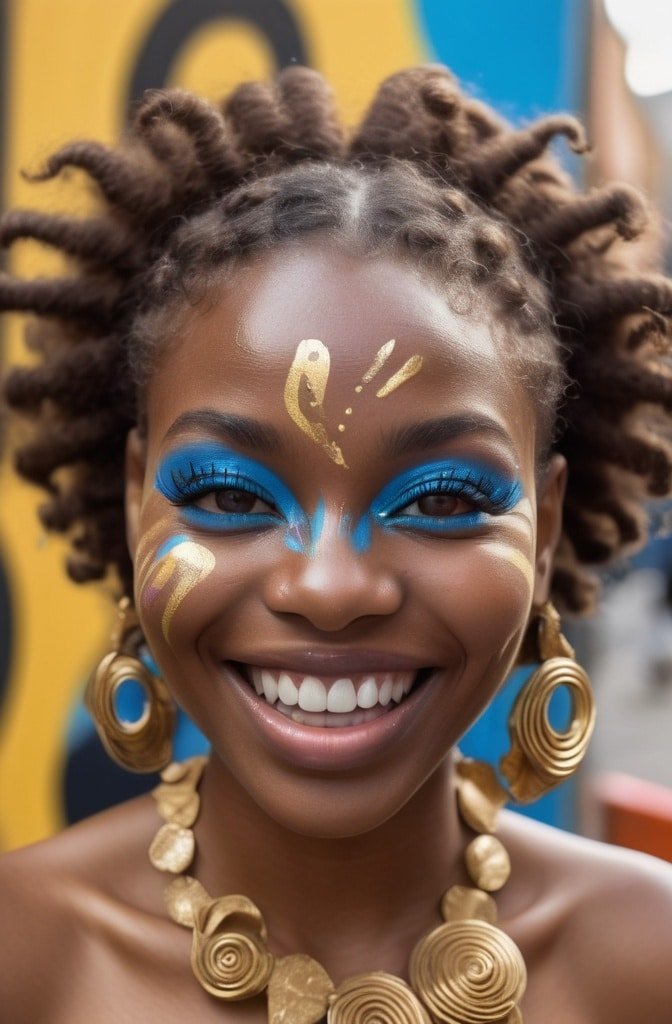
This defined style showcases your natural curl pattern in its most precise form.
Apply a curl-defining cream to small sections of damp hair. Twist each section around your finger from root to tip, allowing the curl to form around your finger. Air dry completely before touching or manipulating the coils.
While time-consuming to create, finger coils can last up to two weeks with proper care. The results are worth the effort – distinct, uniform curls that highlight the natural beauty of your texture.
19. Braid-Out
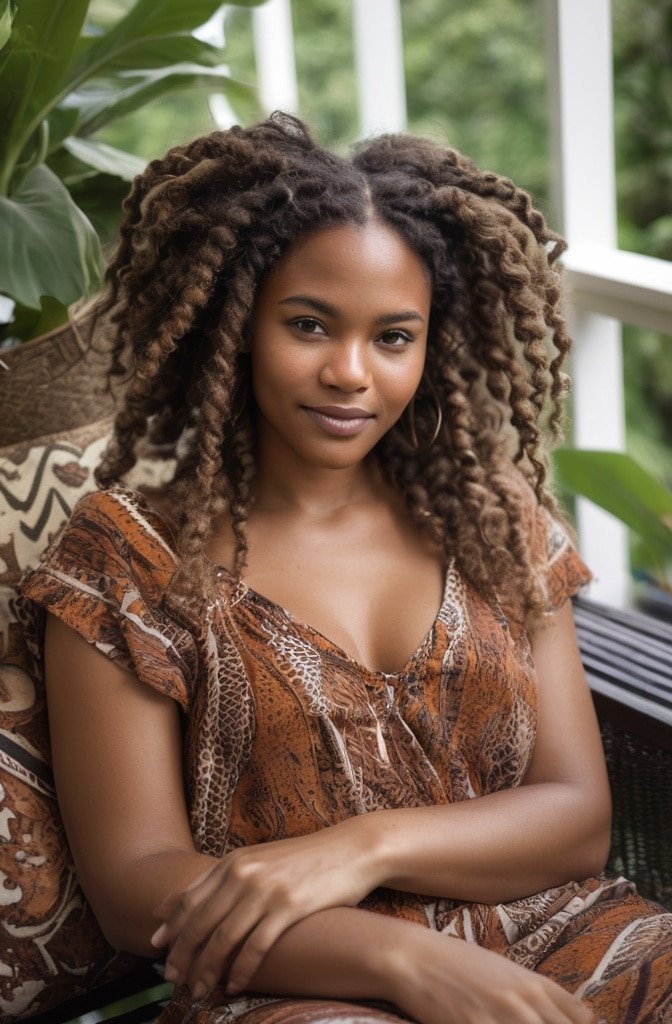
For a different curl pattern than twist-outs provide, braid-outs create waves with more defined crimps and bends.
Section clean, moisturized hair and create traditional three-strand braids. The smaller the braids, the tighter the resulting waves. Allow to dry fully before unbraiding and gently separating with oiled fingers.
I’ve found that braid-outs typically last longer than twist-outs in humid conditions, making them perfect for summer styling or tropical vacations when you need dependable definition.
20. Flat-Twisted Mohawk
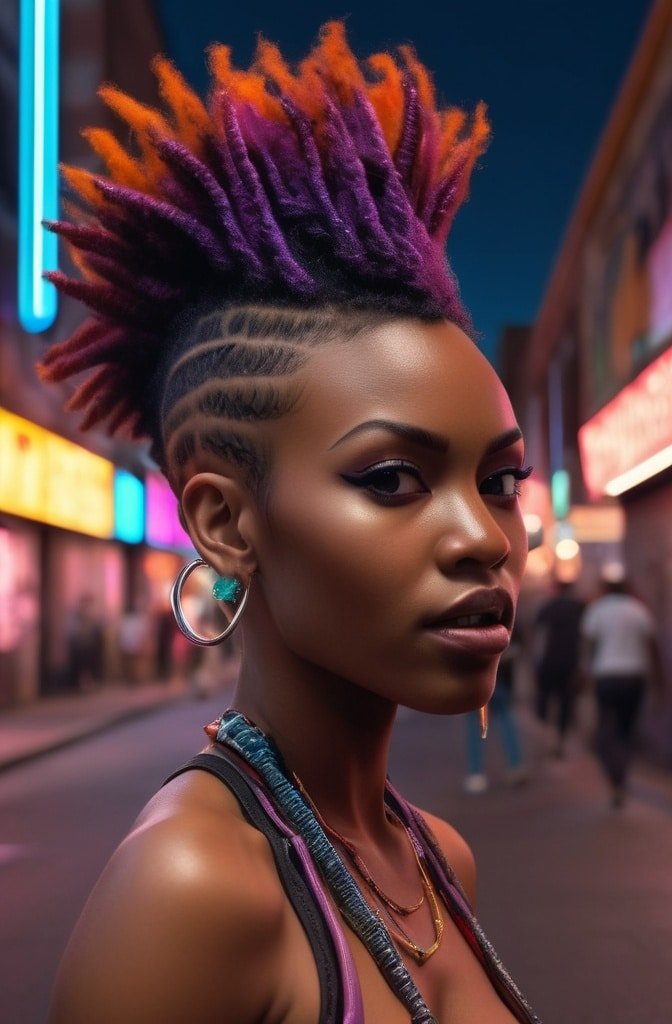
This edgy style creates the illusion of a mohawk without committing to shaving the sides.
Create flat twists on both sides of your head, directing them upward toward the center. Leave a strip of hair untwisted from forehead to nape. Style this center section in an afro, twist-out, or defined coils depending on your preference.
The versatility of this style lets you adjust the width of the center section – go narrow for a more dramatic look or wider for a subtler interpretation of the mohawk aesthetic.
21. Two-Toned Afro
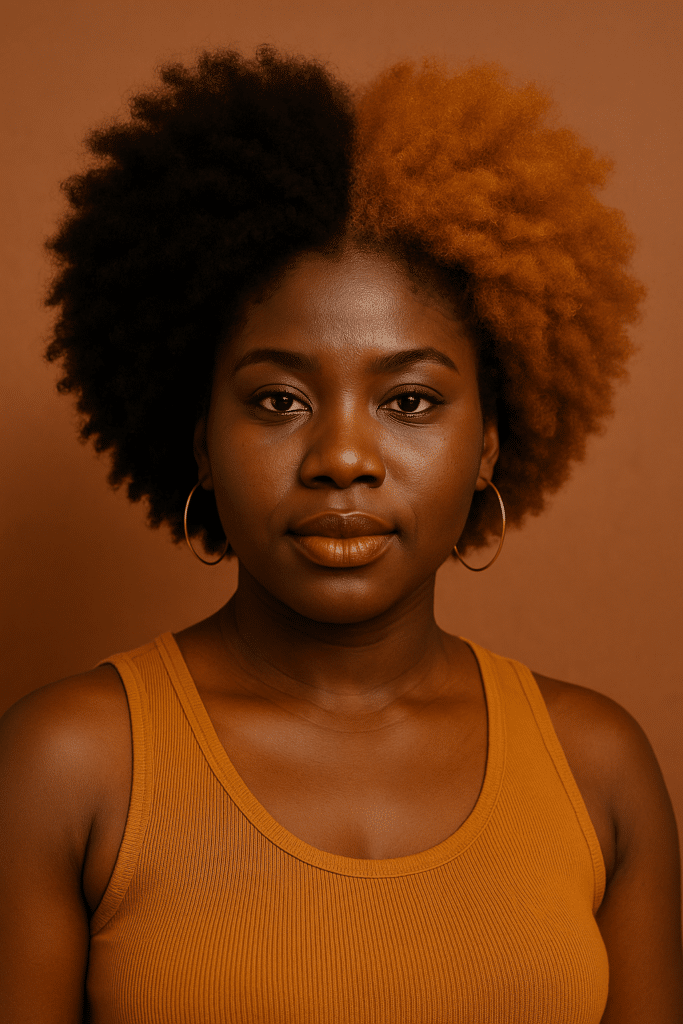
Playing with color adds another dimension to your natural hair journey without necessarily requiring permanent dye.
If you’re not ready for permanent color, try temporary color wax or spray that washes out in 1-2 shampoos. Apply to the tips or scattered throughout for a subtle effect. For a more dramatic look, consider highlights or balayage done by a professional colorist experienced with afro-textured hair.
My personal favorite is adding warm auburn tones to black hair – the contrast catches sunlight beautifully and adds warmth to your overall look.
22. Twist and Pin
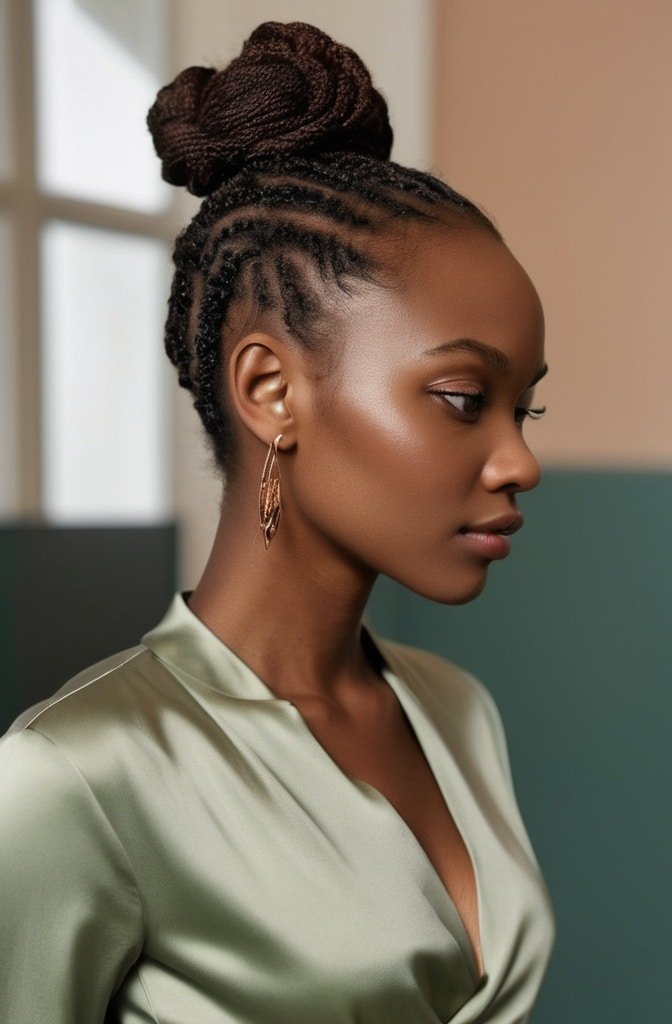
For those “in-between” days when you need a quick but polished style, the twist and pin technique is your saving grace.
Take medium sections of hair and create two-strand twists. Instead of leaving them hanging, wind each twist and pin it against your head in a decorative pattern. Stagger the placement of the coiled twists for a more interesting visual effect.
This style works beautifully on hair of any length and can be as symmetrical or artistic as you desire. Plus, when you remove the pins, you’re left with a gorgeous twist-out!
23. Defined Curly Fro with Deep Side Part
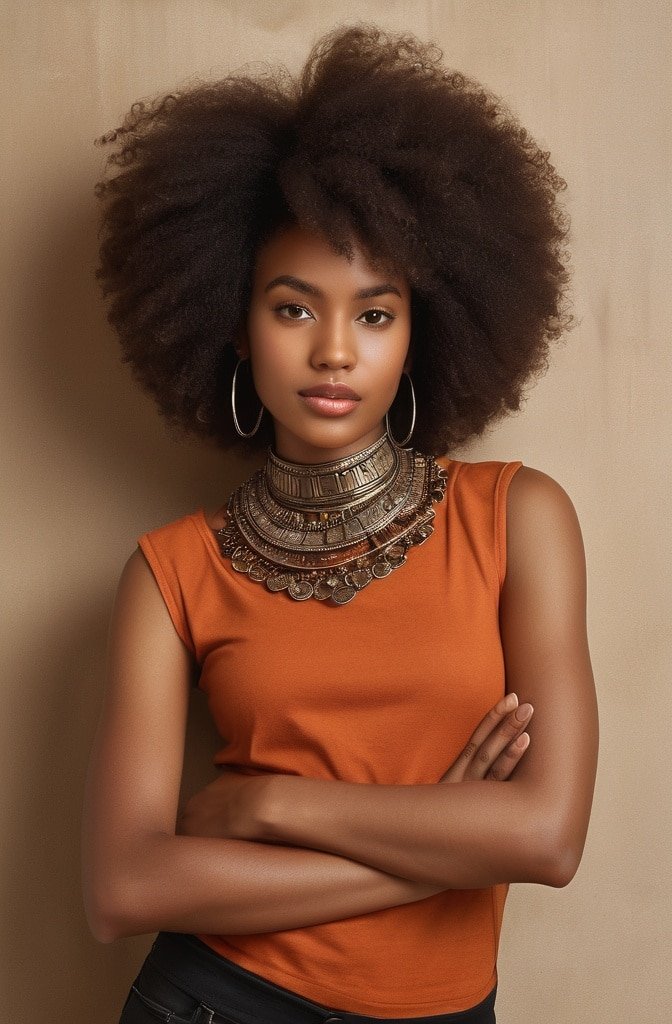
A well-defined curly fro with a dramatic side part creates a sophisticated yet playful silhouette.
After defining your curls using your preferred method (wash and go, twist-out, etc.), create a deep side part while your hair is still slightly damp. Direct volume away from the part for maximum drama. A light hold spray helps maintain the shape.
The asymmetry of this style creates beautiful face-framing effects that highlight your features. I especially love this look paired with bold earrings that peek through the curls.
24. Braided Front with Afro Back
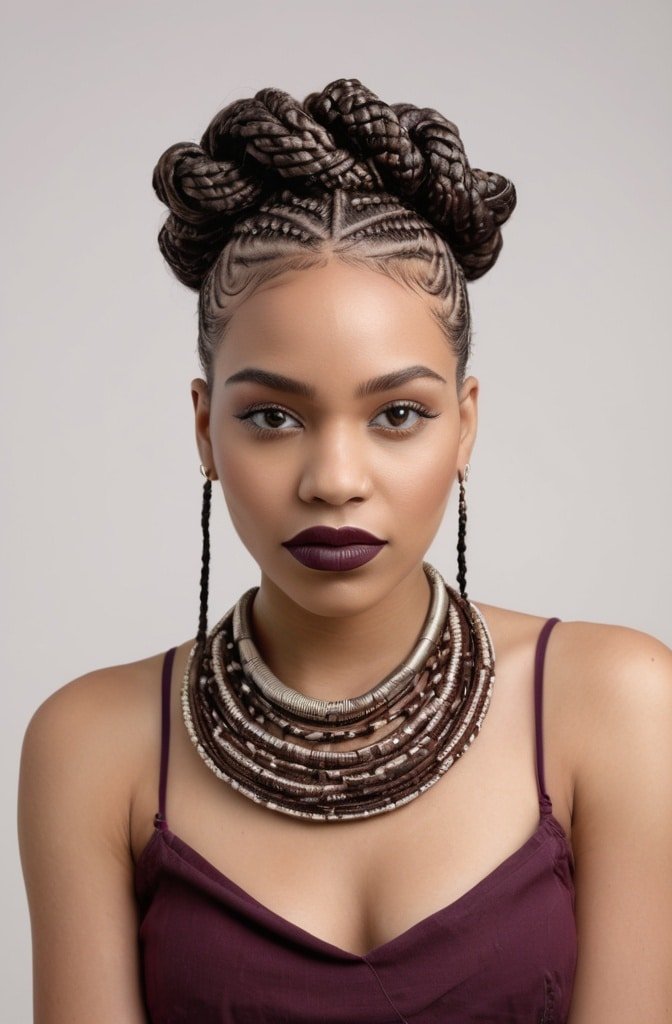
Combine the neatness of braids with the freedom of an afro for this striking half-and-half style.
Create cornrows or flat twists from your hairline back to the crown of your head. Leave the back section loose and pick it into a fluffy afro. The contrast between the structured front and free-flowing back creates visual interest.
This style is perfect for managing grow-out phases or for when you want your hair off your face while still showcasing your texture.
25. Afro With Accessories
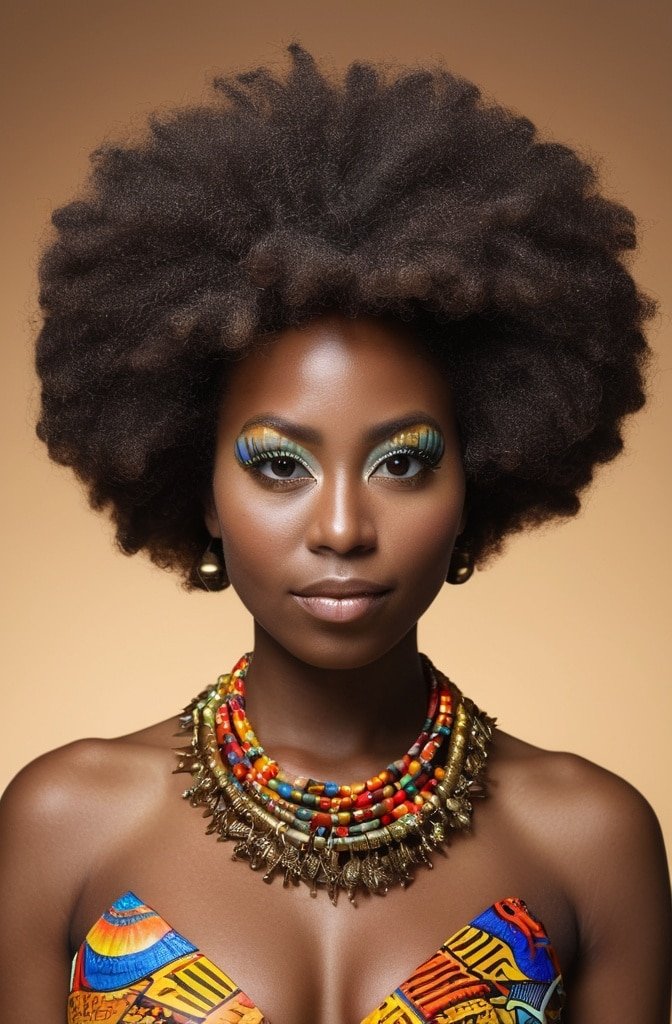
Never underestimate the power of the right accessories to elevate a simple afro into a statement style.
Experiment with colorful scarves wrapped as headbands, decorative pins placed asymmetrically throughout your fro, or even delicate cuffs added to a few strategic coils. Natural materials like wooden beads or fabric flowers complement afro textures beautifully.
My current obsession is using small, thin gold cuffs scattered through my afro for special occasions – they catch the light as you move and add unexpected glamour to an already stunning natural style.
27. Goddess Braids with Curly Ends
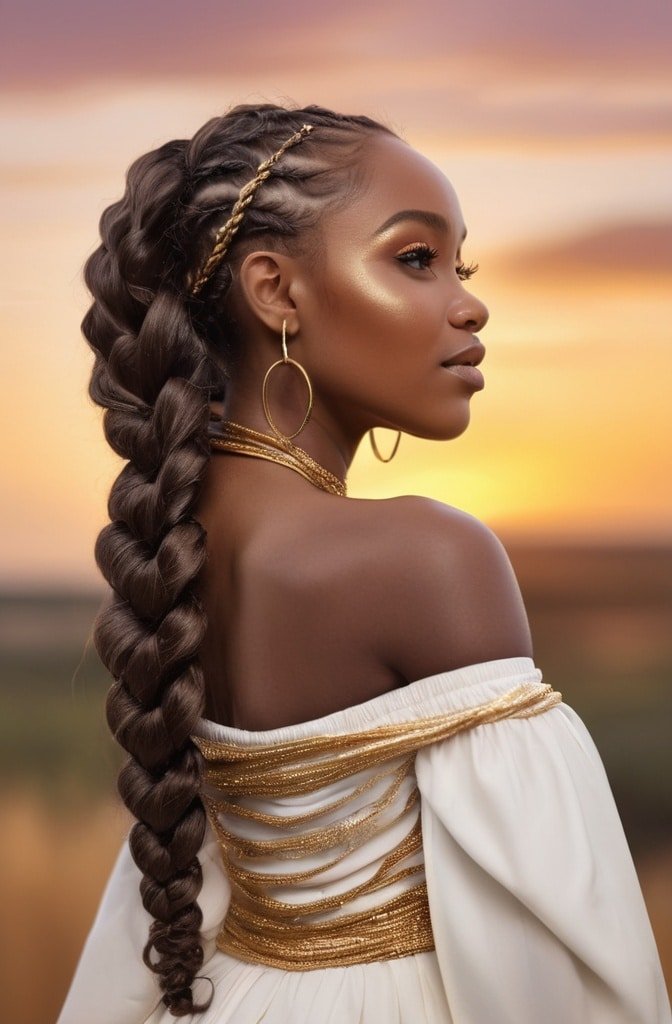
This regal style combines the protection of braids with the beauty of your natural curl pattern.
Create 3-5 large cornrows that flow backward from your hairline. The key difference? Leave the last 2-3 inches of each section unbraided. Once the braids are complete, define those loose ends with your favorite curl cream for beautiful texture contrast.
I love how this style provides the ease of a protective style while still showcasing your natural curl pattern at the ends. It’s basically the best of both worlds!
28. Stretched Twist-Out with Defined Roots
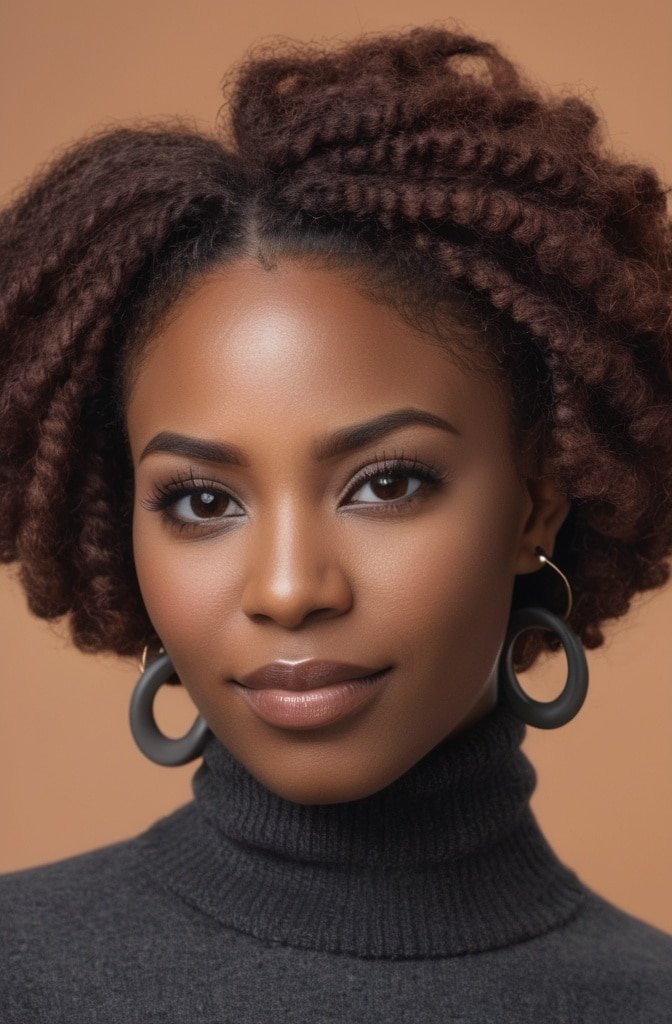
This variation on the classic twist-out creates unique texture by manipulating different parts of each twist.
Create your usual two-strand twists, but focus on twisting the roots extra tight while leaving the length slightly looser. After drying, unravel as usual. The result? Structured volume at the roots with flowier definition through the lengths.
This technique gives amazing root lift that helps your style defy gravity and creates a beautiful silhouette that frames the face gorgeously.
29. Cascading Tendrils
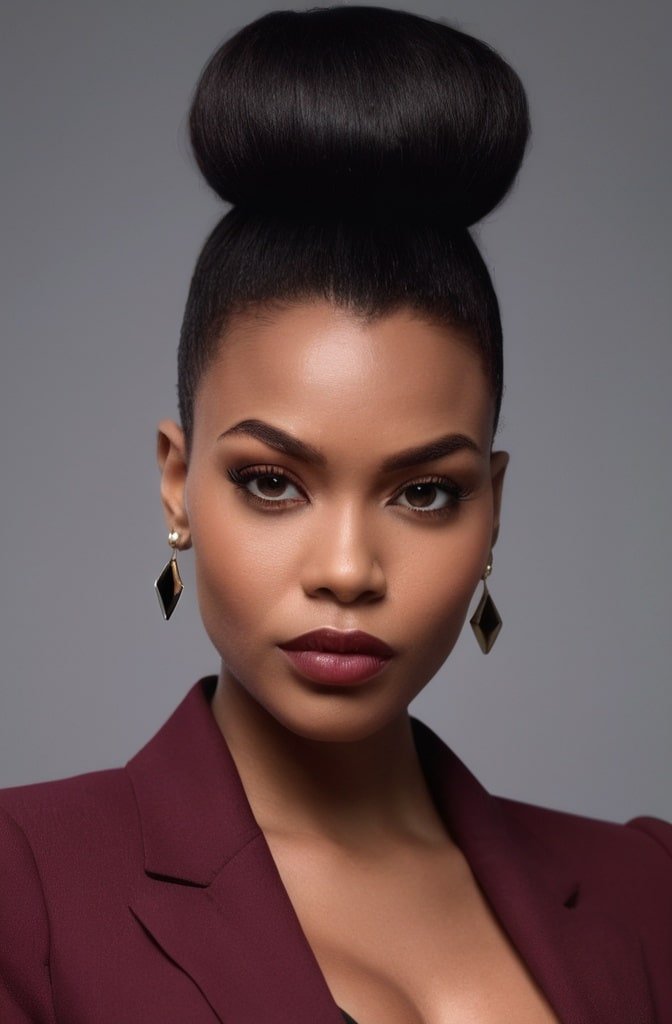
This romantic style combines an updo with strategically placed spirals around the face.
Gather most of your hair into a high puff or bun secured with a covered elastic. Before styling, set aside several small sections around your hairline. Define these sections with finger coils or small two-strand twists and allow them to frame your face.
The juxtaposition of the sleek pulled-back style with those soft face-framing coils creates a whimsical, romantic look thats perfect for date nights or special occasions.
30. Pompadour Puff
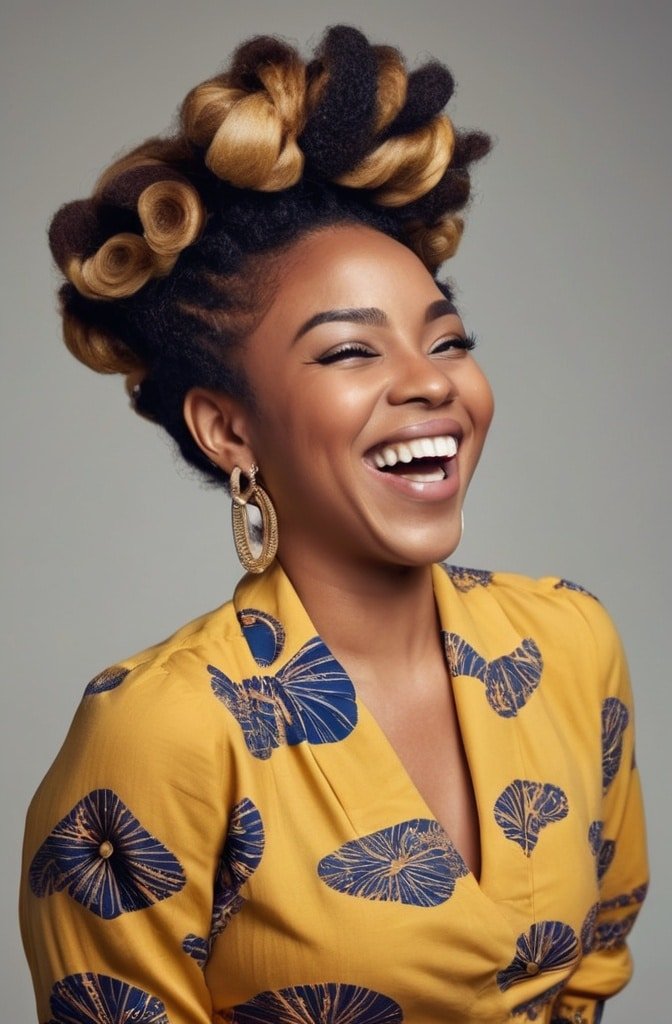
Channel vintage vibes with this modern take on a classic silhouette that works beautifully with natural texture.
Begin by creating a horizontal part from ear to ear, separating the front section from the back. Gather the back into a low puff or bun. For the front section, use a combination of teasing at the root and smooth rolling to create height and that signature pompadour shape. Secure with bobby pins.
This style is giving major glam while being surprisingly easy to achieve. The volume at the front creates a stunning profile that photographs amazingly well!
31. Cornrowed Crown with Twist-Out Bang

This style offers the best of both worlds – the security of protective styling with the softness of defined curls.
Create cornrows from the nape of your neck upward, continuing over the crown of your head. Leave a section at the front uncomrowed. Two-strand twist this front section and allow to dry completely before unraveling for a perfect twist-out bang.
The structure of the cornrows paired with the softness of the twist-out creates wonderful texture contrast. Plus, this style can easily last two weeks with proper nighttime protection!
32. Curly Faux Hawk
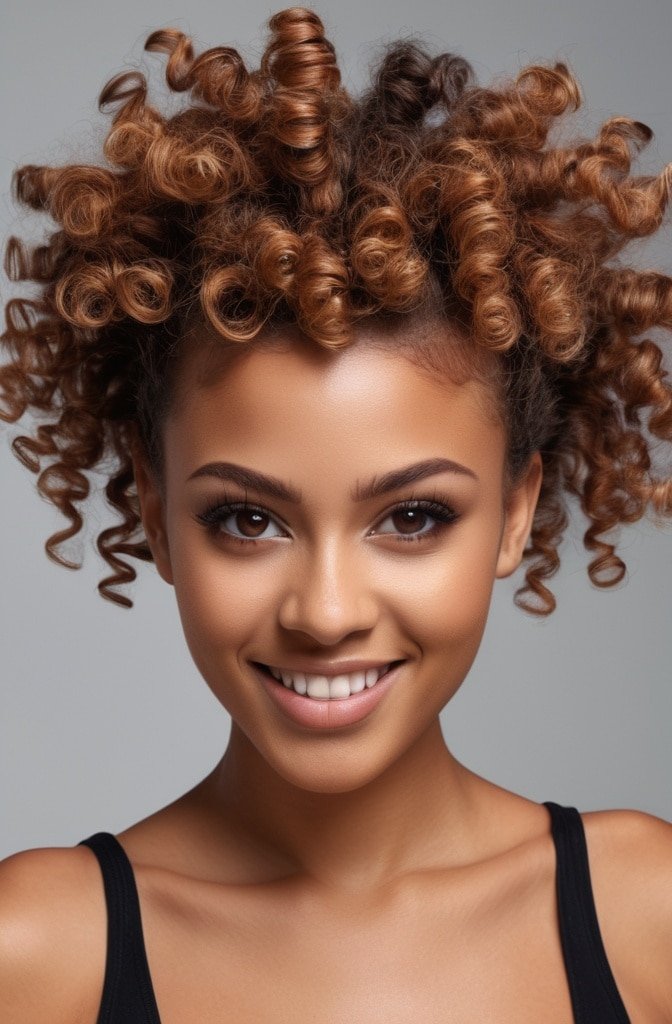
Embrace your inner rockstar with this edgy style that doesnt require any cutting.
Create flat twists on both sides of your head, directing them upward. Leave a strip of hair from your forehead to the nape of your neck untwisted. Apply curl-defining products to this middle section and either pick it out for volume or define it with your favorite curl method.
What makes this style so versatile is how you can adjust the width of the center section – go narrow for dramatic impact or wider for a subtler interpretation.
33. Twisted Topknot with Shaved Sides
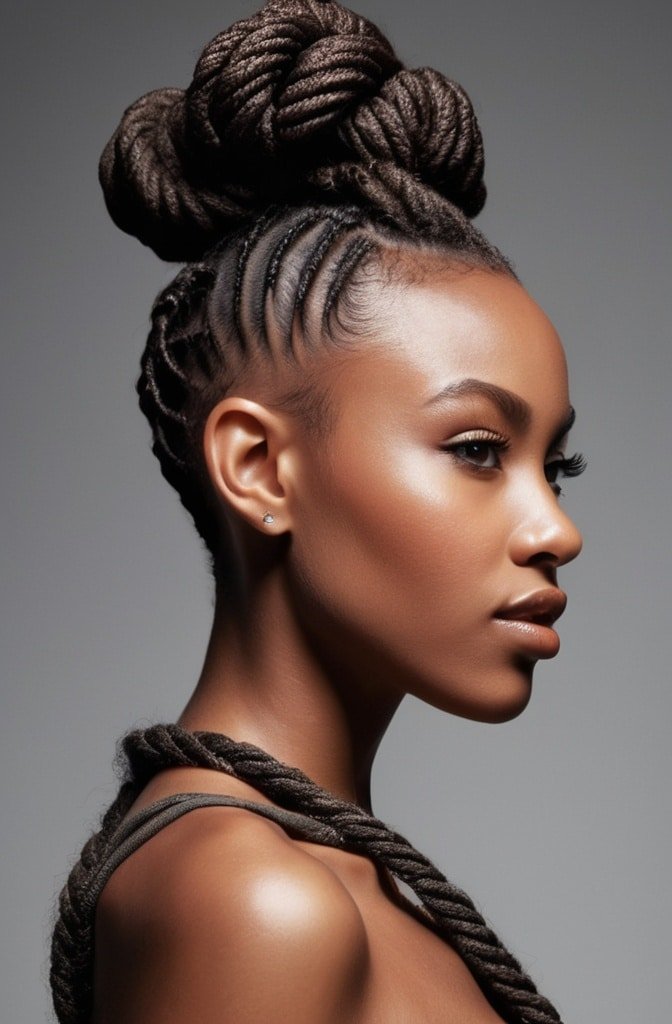
If you’ve already got an undercut or tapered sides, this style showcases that contrast beautifully.
For those with already tapered or undercut sides, gather the longer top section and twist it from front to back. Wrap the twisted length around itself to form a topknot and secure with pins. Apply edge control to sleek down any flyaways around the hairline.
The juxtaposition of the sleek sides with the textured topknot creates architectural interest that highlights your face shape and bone structure.
34. Staggered Puffs
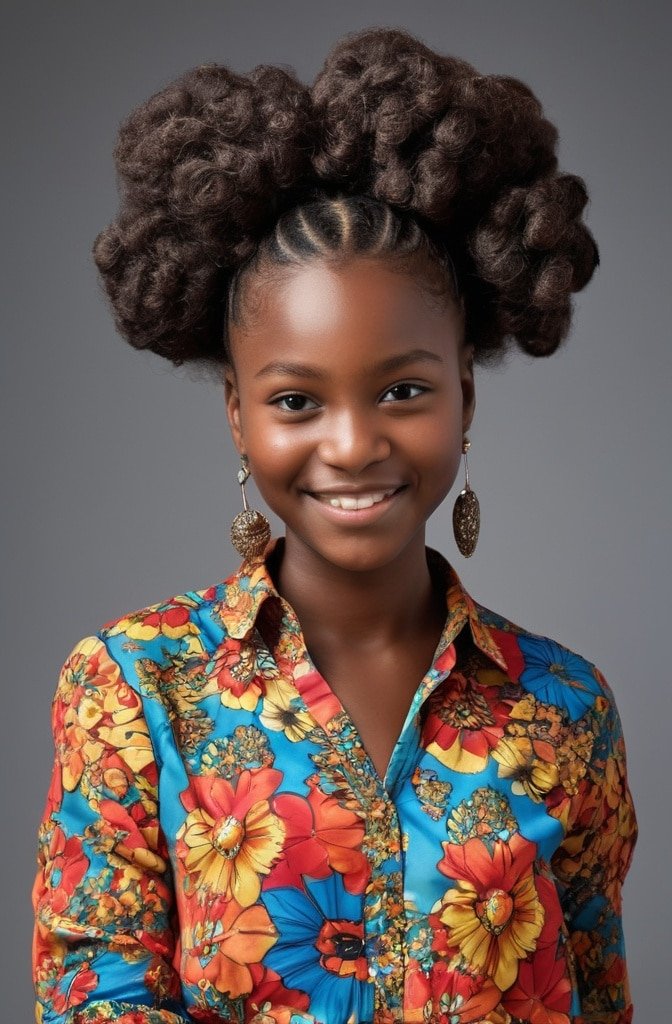
This playful style is a fun variation on traditional afro puffs, creating a mohawk-like effect.
Instead of just two puffs, create 3-5 smaller puffs aligned down the center of your head. Secure each section with covered elastics and fluff to desired fullness. The size of each puff can be uniform or graduate from smaller to larger for added visual interest.
This style is so versatile – wear it sporty and casual or dress it up with decorative elastics and edge control for a more polished look.
35. Angled Bob on Natural Hair
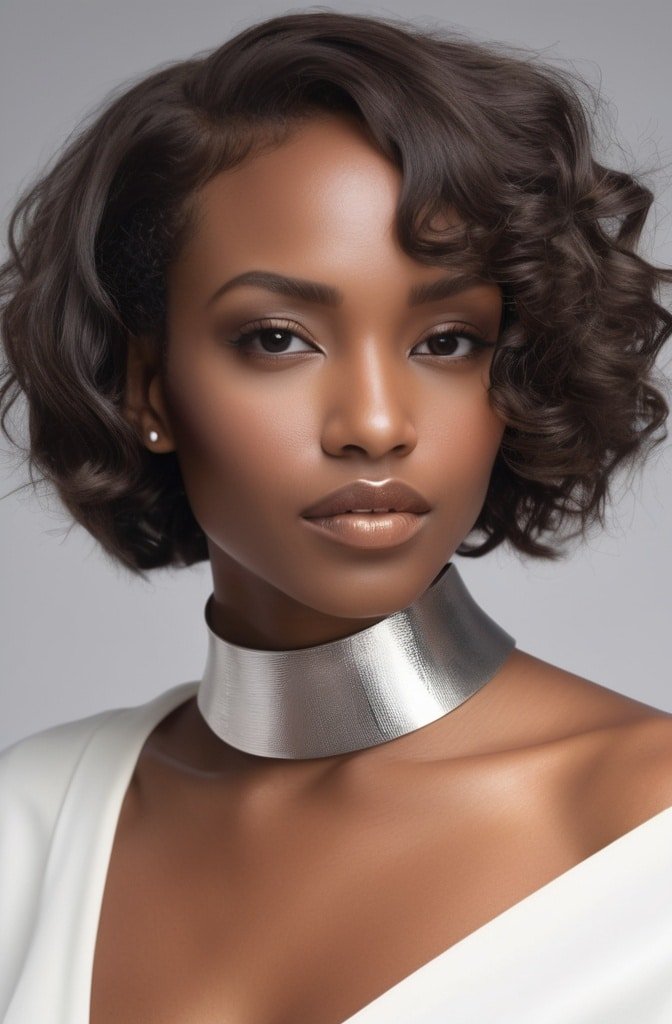
You don’t need heat or chemicals to rock a sleek geometric cut – strategic shaping can create the illusion on natural textures.
Work with a professional stylist experienced with natural hair to create a shape that’s longer on one side and gradually shorter on the other. Style with a twist-out or defined wash and go to showcase the intentional asymmetry of the cut.
The beauty of this style is in its precision – the architectural lines of the cut shine through even with your natural texture, proving structured styles aren’t just for straight hair!
36. Twisted Mohawk
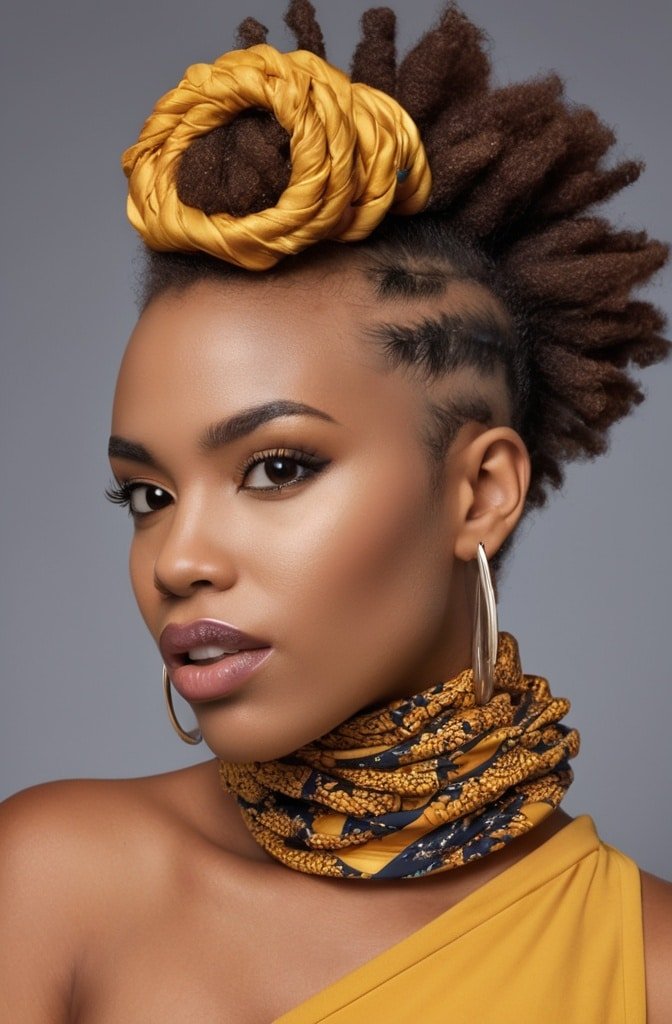
This dramatic style creates height and drama while keeping hair secured and protected.
Divide your hair into multiple sections from front to back. Create two-strand twists with each section, but instead of letting them hang down, pin each twist upright, creating a row of twisted spikes along the center of your head. The sides can be flattwisted back or left loose depending on your preference.
I love how customizable this style is – adjust the height and number of twisted spikes for different levels of drama. It’s surprisingly comfortable too, since the twists are securely pinned.
37. Double-Strand Twist Hawk
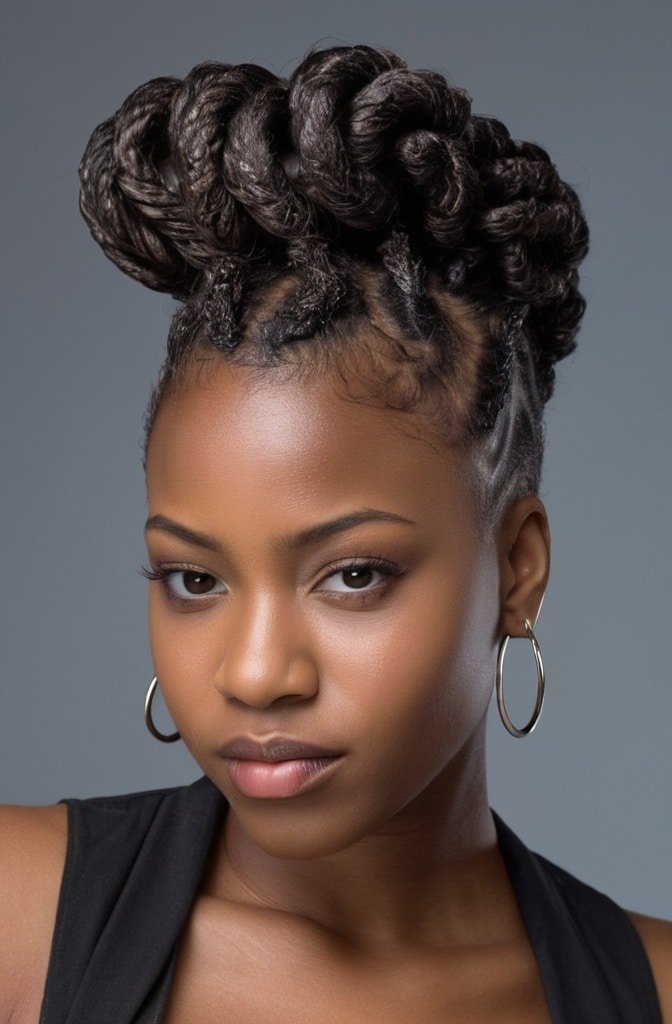
This variation on the mohawk concept uses chunky two-strand twists arranged in a mohawk formation.
Create large two-strand twists all over your head. Then gather and pin the twists into a mohawk shape down the center of your head, with the ends of the twists directed upward. The sides can be slicked down with gel or edge control for maximum contrast.
What makes this style special is the chunky texture of the twists combined with the edgy mohawk silhouette – it’s structured yet full of beautiful texture.

Tina Johnson | Fashion Mags Your ultimate style guide! Trendy tips, latest fashion news & inspiration to keep you chic & glamorous.

